Verdigris &
Toxic Green
A complete bench guide for the corroded-bronze, radioactive-green Drukhari scheme. Non-Citadel paints only, airbrush plus brush, built up zone by zone so every Venom, Raider, Wych, Hellion and Reaver looks like it came off the same table.
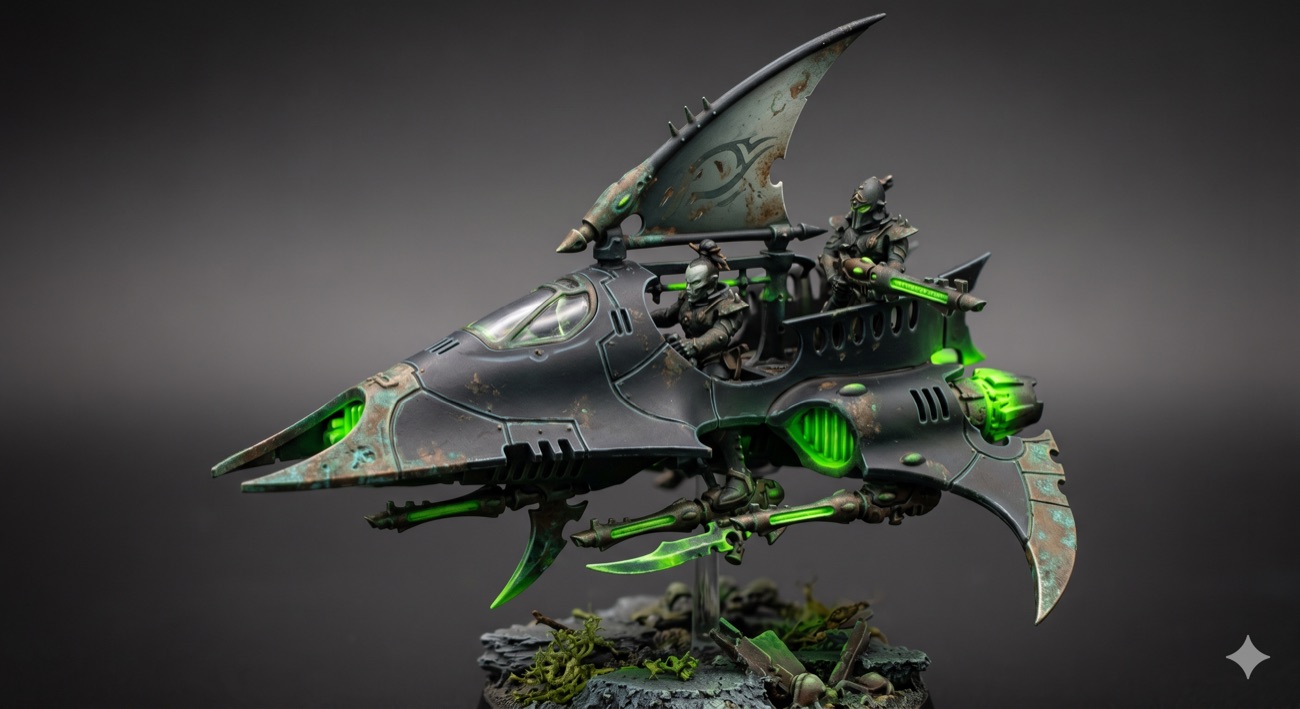
One material story, five kits
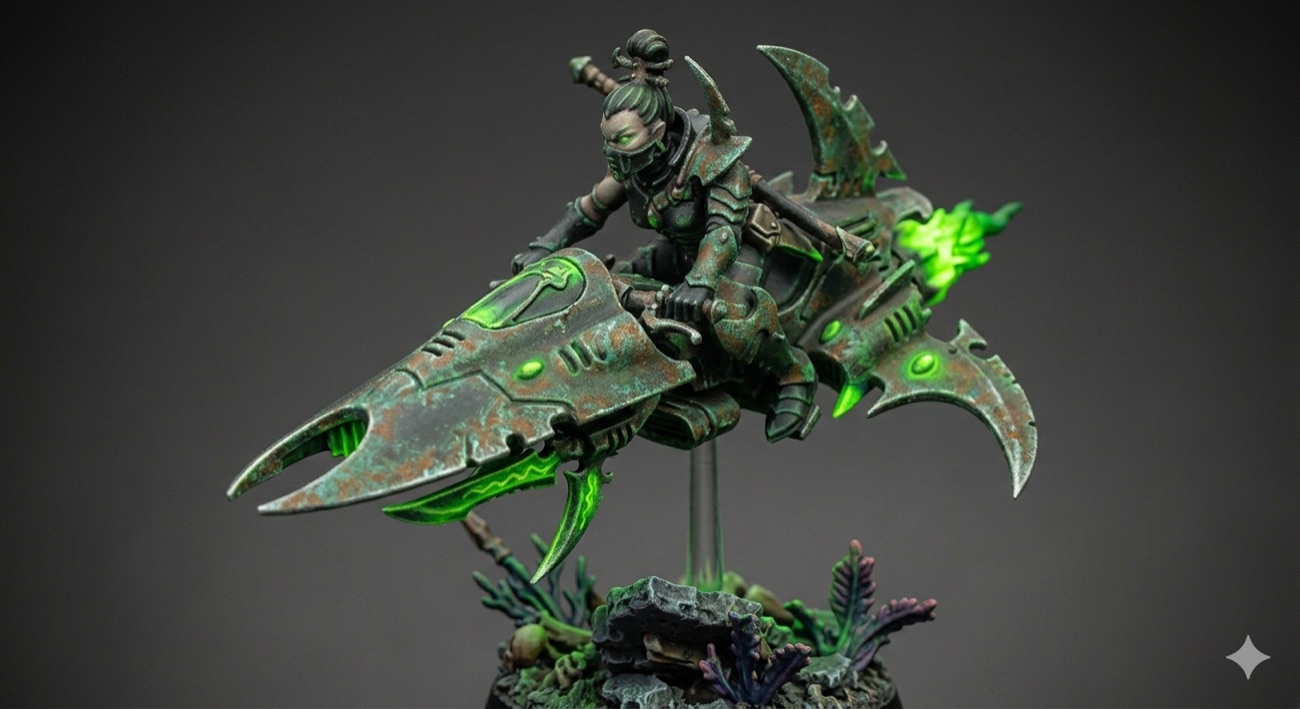
The whole army reads as a single recipe: a cold, near-black shell, wrapped in corroded bronze that has gone heavily to verdigris, lit from inside by a sickly green. Get those three talking to each other and the scheme holds across every unit.
What gets airbrushed vs drybrushed
You spotted both, and that is the trick of the scheme: smooth volumes and glow are sprayed, the gritty corrosion is hand-worked. Here is the split.
Airbrush
- Black to grey zenithal on the whole model (the volume you see on the hulls and bodysuits)
- Large hull base coats and shading on the Venom and Raider
- The green OSL glow radiating from every blade, vent, flame and base crack
Drybrush / stipple
- The entire verdigris and rust patina on blades, hulls, the skyboard and the jetbike
- Sponge or stipple, never spray, or you lose the grit
- Rocky bases and bone get a dry drag of grey and off-white
Brush
- Bright energy cores and the white-hot tips of blades
- Cold grey edge highlights on the armour
- Flesh, faces, runes and jewels
The five concepts
Generated as scheme references, not exact model studies. Use them for colour placement and mood.
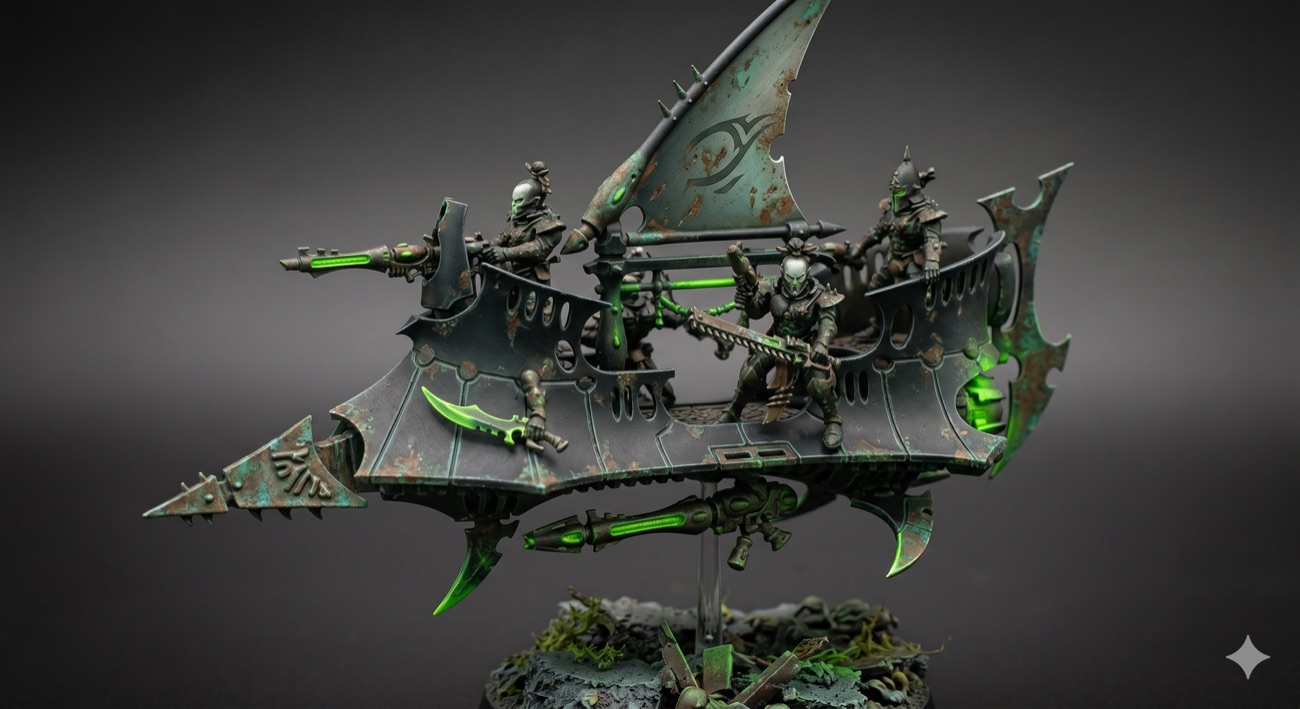
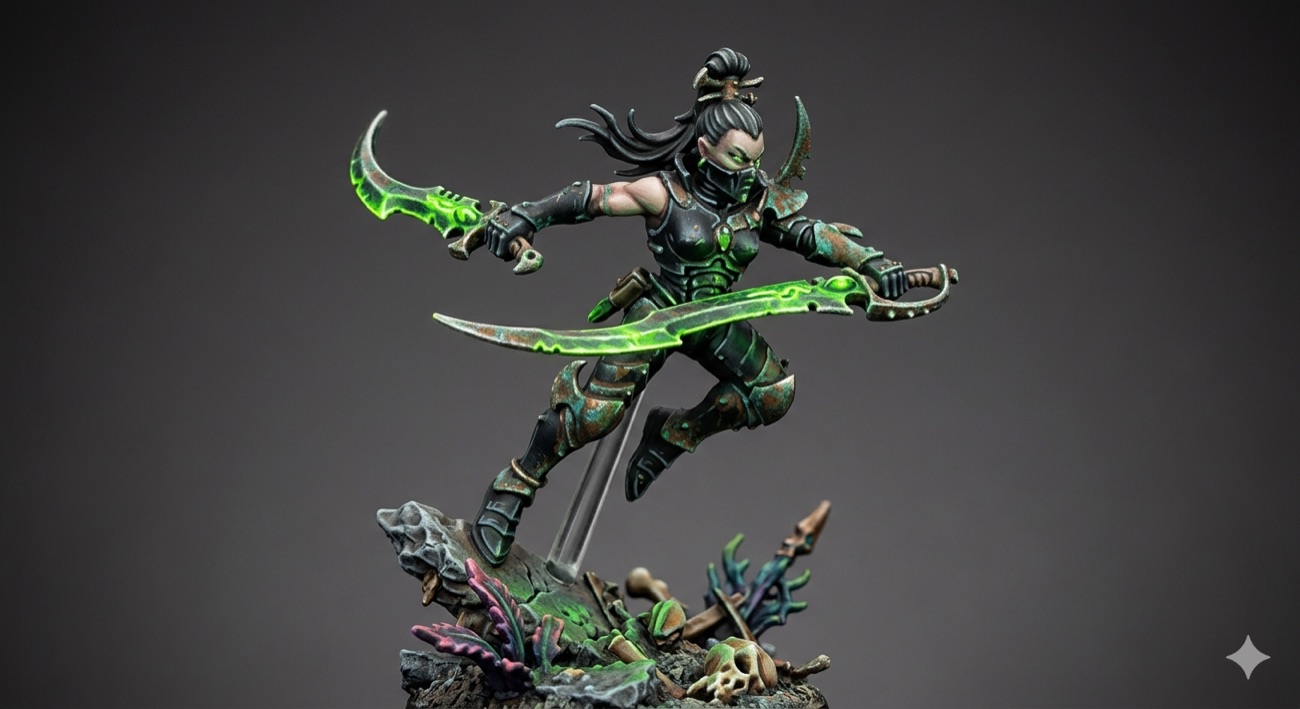
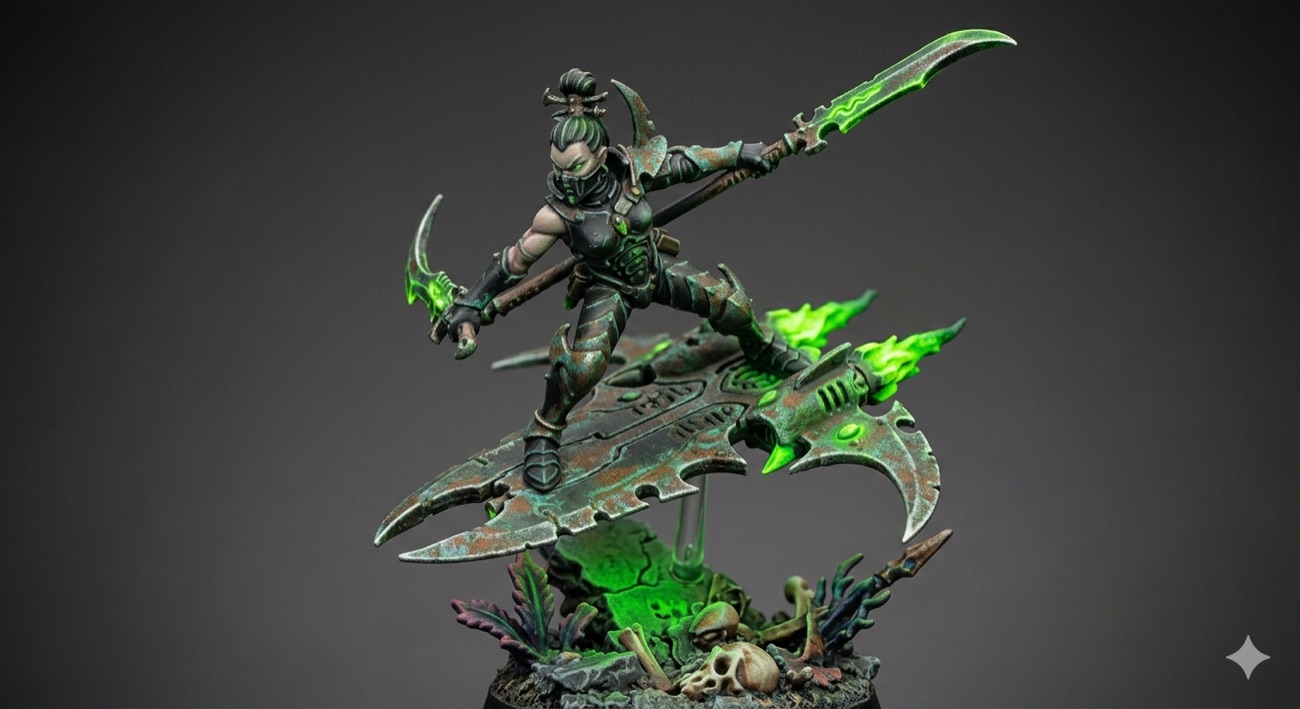
Paints by zone
Non-Citadel throughout. Brands are picked for airbrush friendliness where it matters. Swatches are approximate.
Cold near-black shell
- Vallejo Surface Primer Black — airbrush primer, the foundation
- Vallejo Model Air Black Grey — first zenithal lift, sprayed low and broad
- Vallejo Model Air Neutral Grey — main zenithal volume from above (tiny Light Grey 71.050 on the top planes)
- Vallejo Model Color Dark Sea Green — thinned to a glaze for the cool teal-black tint
- Vallejo Model Color Pale Grey Blue — cool brush edge highlights, sharpest corners only
Corroded verdigris metal
- Vallejo Metal Color Gunmetal Grey — base metal, airbrush or brush
- Vallejo Metal Color Bright Brass — warmer bronze patches under the verdigris
- Vallejo Rust Texture — stipple the dark, crusty grime into recesses (the Typhus-style base)
- AK Weathering Pencils, Rust & Streaking Set — dot and streak rust spots, Vivid Orange on the hot points
- Vallejo Game Color Verdigris — the teal oxide, stippled then lightly drybrushed (or AK Verdigris Wash AK19313)
Toxic green energy & OSL
- Vallejo Game Color Scorpy Green — mid-green base of the energy
- Vallejo Game Color Livery Green — bright lime highlight toward the core
- Green Stuff World Fluor Paint Lime — the glow itself, airbrushed halo + mixed into the core
- Vallejo Game Color Off White — white-hot tip at the very brightest point
- Army Painter Green Tone — glaze to unify the transition and tint shadows
Pale xenos flesh
- Vallejo Model Color Pale Sand — pale flesh base; add a touch of Green Grey 70.886 for the sickly cast
- Army Painter Purple Tone — cold recess shade for the xenos cast
- Vallejo Model Color Off White — highlight on the raised forms
- Vallejo Xpress Templar White — one-coat pale base if you want speed
Bases
- Vallejo Model Color German Grey — dark rock base; drybrush up Neutral Grey 70.992 then Light Grey 70.990
- Vallejo Dark Sand / Iraqi Sand — bone shadow then highlight (or one-coat Xpress Bag of Bones 72.450)
- Gamers Grass Alien Purple + Burned — the alien plant tufts
- Green spill — airbrush / glaze Fluor Lime + Scorpy Green into cracks, brightest at centre
The order to paint
One pass from primer to varnish. Keep the glow near the end so it ties the model together.
Assemble and prime black
Mount on a handle, prime with Vallejo black surface primer.
Zenithal volume
Spray Black Grey then Medium Sea Grey from above to build the form on armour and hulls.
Cool the shell
Glaze the teal-black tint over the armour zones so it reads cold.
Block and shade the metal
Gunmetal and brass on the bladed surfaces, then the Dark Tone wash.
Build the verdigris and rust
Stipple dark then orange rust, then stipple and lightly drybrush the Verdigris Effect. Take your time here, this is the scheme.
Lay in the green glow
Spray the OSL halo outward from every blade, vent, flame and base crack.
Hot cores and edges
Bright green cores, white-hot tips, then cold-grey edge highlights on the armour.
Flesh, faces, details
Skin, eyes, runes and jewels, with a touch of reflected green near the weapons.
Bases and varnish
Finish the base, matt varnish the model, then gloss just the energy bits so they pop.
Grimdark pass with Villainy Ink
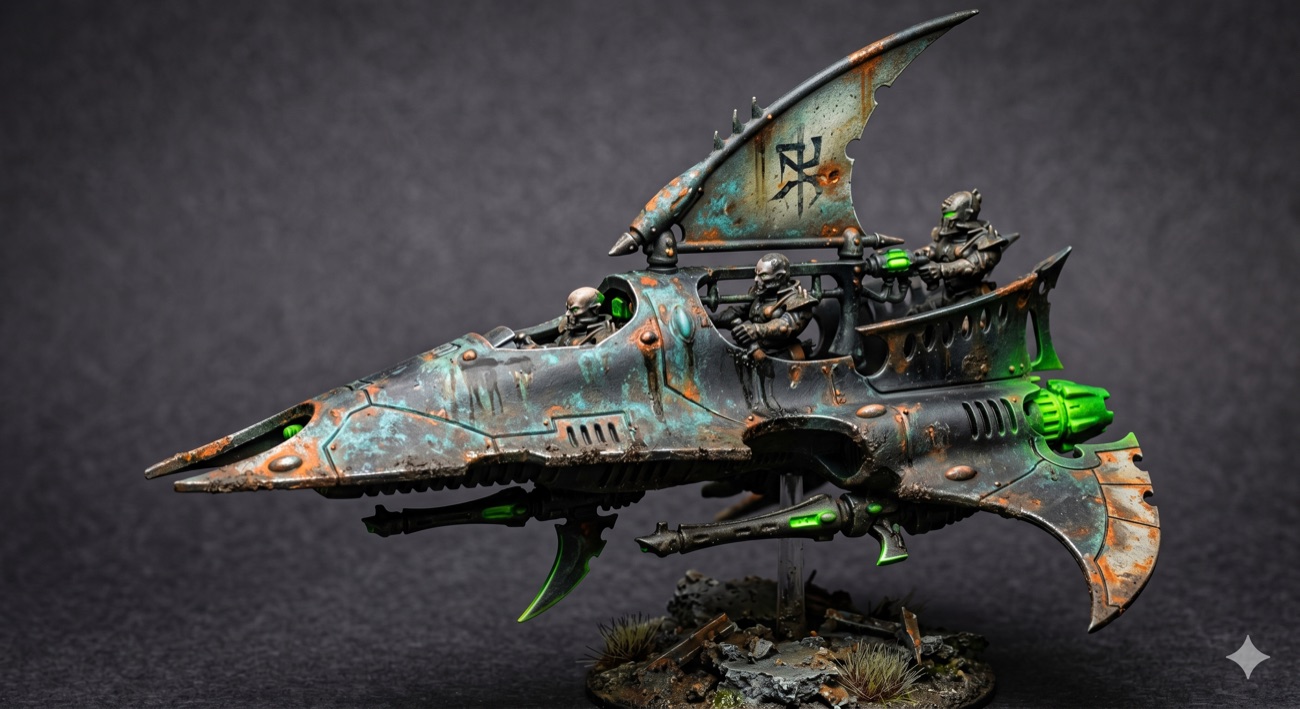
The acrylic recipe above is the clean base. This is how you take it from studio-clean to battle-worn raider, using your Grim Core Set I and Flesh Core Set II enamels. They sit over the sealed acrylic and stay movable, so you place grime exactly where a raider would collect it, then wipe the rest back.
Grim Core Set I
- Goon's Grime — all-over unifying grime and a pin wash into every panel line
- Decrepit Filth — darker shadow pushed into deep recesses, under-hull and engine intakes
- Sector Rust — rust streaked down from rivets, blade edges and vents, over your acrylic rust
- Decay of Death — green rot and slime on the bases and where the energy pools
Flesh Core Set II
- Coelia Green — mottle and deepen the verdigris (granulating turquoise patina), then the sickly flesh
- Ichor of the Damned — warm black for deep recesses, soot around vents and engines, panel lines
- Blighted Bone Ochre — pale bone wash on skulls and bone, and to age the pale flesh
- Decay of Death — sickly deposits (also in Grim Core I, so you carry a spare)
On the vehicles
- Gloss varnish
- Goon's Grime all over, then pin wash every panel line
- Decrepit Filth and Ichor into the deep recesses and around the vents
- Sector Rust streaked down from rivets and edges
- Coelia Green mottled over the verdigris to deepen it
- Decay of Death rot near the base and where the green pools
- Matt varnish, then re-gloss the green
On the riders
- Gloss varnish
- Flesh: Coelia Green mottle, Ichor shadow, Blighted Bone Ochre pale wash, Decay of Death for the sickly tone
- Armour and blades: Goon's Grime and Ichor in the recesses, Sector Rust on the blade metal
- Keep the green energy blades clean, then re-gloss them
The paints that make the scheme
Five things that sell it
Paint the OSL after the metal and verdigris are done. Layered on top, the green ties separate areas into one light source.
Stipple and sponge it, never airbrush it. The randomness of hand texture is exactly what makes corrosion read as real.
Matt varnish the whole model, then hit just the blades, vents and engine cores with gloss so they look wet and lit.
Orange rust is a spice, not a base. A few stippled spots near edges and rivets does more than coating the panel.
The green that spills onto the base should match the model. Spray both from the same source so they feel like one scene.
It is almost all verdigris, so it is the best place to dial in the corrosion before you commit to a hero model.